Introduction
Custom Patches USA have become a common choice for people who want to add a personal touch to clothing and gear. They are simple pieces of fabric with a design that shows identity, purpose, or style. Many people use them for team wear, hobby groups, work uniforms, or personal items. This guide explains the practical uses, types, and steps to pick the right patch without turning it into a sales pitch. It focuses on clear and helpful points so you can make good choices for your needs.
Understanding Custom Patches USA
Custom patches come in many forms. You can place them on jackets, hats, backpacks, or even soft gear used in outdoor settings. The goal is often to show a message or give visual value to an item. When you know the basics, it becomes easier to pick a patch style that fits your purpose.
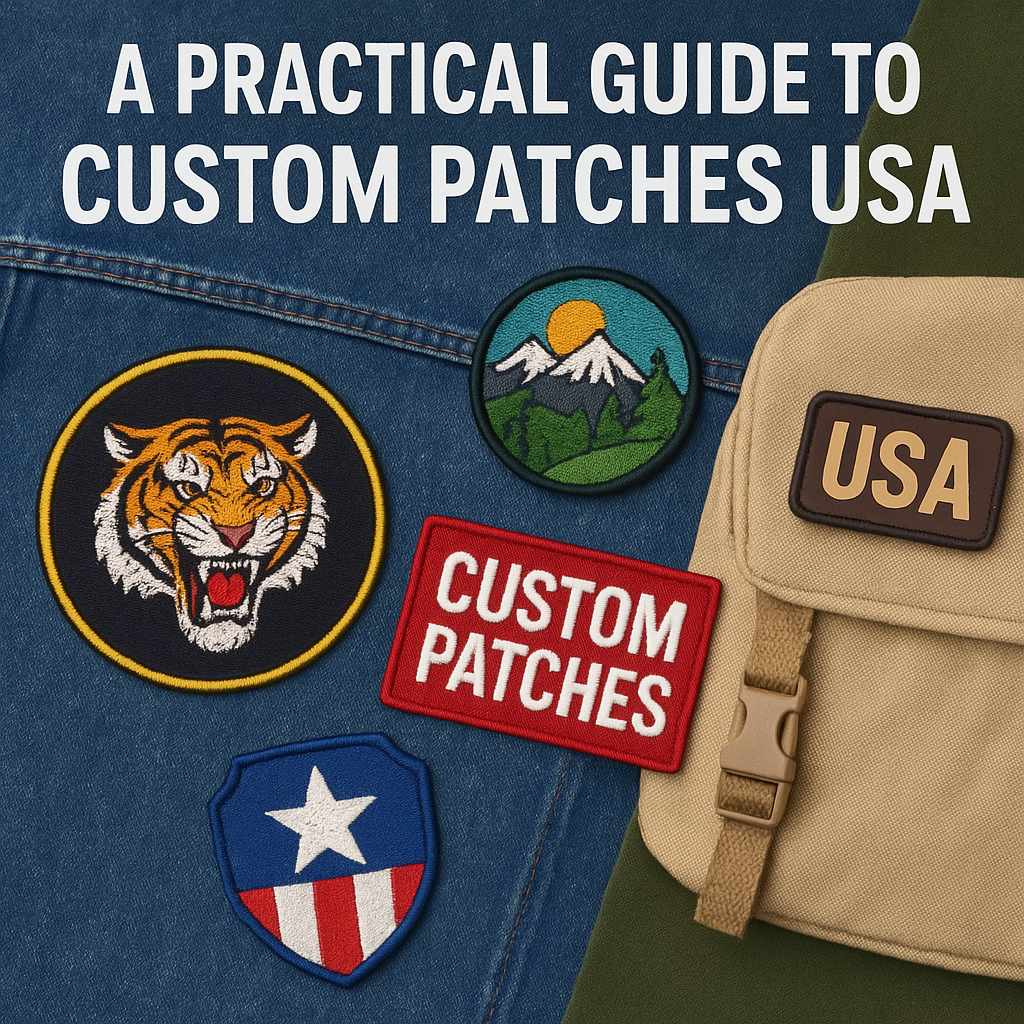
Common Patch Types
Below are the most used patch styles in the USA:
-
Embroidered patches
-
Woven patches
-
Printed patches
-
PVC patches
Each type works for different uses and design needs.
Choosing the Right Patch Style
Embroidered Patches
These patches have raised threads that make the design stand out. They bring a classic look and work well for logos, initials, and bold shapes. They suit jackets, caps, uniforms, and thicker fabrics.
Woven Patches
Woven patches use thinner threads, so they show more detail than embroidered ones. They work well when the design has small text or fine lines.
Printed Patches
These patches show full images like photos or multi color artwork. They are flat and smooth, making them strong choices for detailed art or bright images.
PVC Patches
PVC patches are made of soft rubber. They are long lasting and stay in good shape even in rough weather. Many outdoor users choose them for bags or tactical gear.
Key Points to Consider Before Making Your Patch
It helps to look at a few simple points before choosing a patch. This keeps the process smooth and makes the final result look clean.
Purpose
Think about where the patch will go. A work uniform needs a different style than a fashion item. The purpose guides the shape, size, and material.
Fabric Type
Light fabric needs a lighter patch, while thick fabric can hold heavy types. Knowing this helps with comfort and placement.
Attachment Method
Patches can be placed in different ways:
-
Iron on
-
Sew on
-
Velcro
-
Adhesive
Iron on and sew on are common for clothing. Velcro works well for gear that needs quick changes.
Size and Placement
A patch that is too large or too small may not look balanced. Measure the space to find a size that matches the item.
Ways to Use Custom Patches USA in Daily Life
Custom patches are not just for uniforms or teams. Many people use them for personal and practical purposes.
Clothing
People add patches to jackets, denim, hats, and hoodies. They help show personality, interests, or group belonging.
Bags and Backpacks
A patch can make a bag easy to identify. Students, workers, and travelers often use them for quick recognition.
Events and Group Activities
Groups use patches for sports, clubs, charity events, school teams, and outdoor trips. A patch helps show group unity.
Repairs and Cover Ups
If a piece of clothing has a small tear or stain, a patch can cover it and give the item a new look.
Simple Comparison Table for Patch Types
| Patch Type | Best For | Look | Durability | Detail Level |
|---|---|---|---|---|
| Embroidered | Logos and bold designs | Raised thread look | High | Medium |
| Woven | Small text and fine lines | Flat and smooth | High | High |
| Printed | Photos and multi color art | Flat surface | Medium | Very high |
| PVC | Outdoor and tactical gear | Soft rubber feel | Very high | Medium |
Steps to Plan Your Patch Project
Step 1: Set the Purpose
Think about why you need the patch. This will guide every other choice.
Step 2: Pick the Material
Match the patch type to your item and design.
Step 3: Prepare Your Design
Keep the design simple if you want it to look clean on fabric.
Step 4: Choose Size and Shape
Round, square, or custom shapes all work. Pick what fits the design.
Step 5: Select the Attachment Method
Choose iron on, sew on, adhesive, or Velcro based on the item.
Step 6: Plan Placement
Hold the patch against the spot first to see how it looks.
Conclusion
Custom Patches USA can add meaning, function, and style to many items. When you understand the patch types and how they work, it becomes easier to choose one that fits your needs. With clear planning and simple steps, you can use patches for daily items, group activities, or personal projects. This guide gives you practical points so you can make your choices with confidence and create results that look clean and natural.
For more details please visit nail fungus.